

Table of Contents
- Why Braided Line Twists and Slips During Spooling
- What You'll Need Before You Start
- Understanding Braid Line Spool Direction and Reel Orientation
- How to Spool Braid on a Spinning Reel with Monofilament Backing
- How to Prevent Line Twist on a Spinning Reel When Loading Braid
- Threading Braided Line Through Rod Guides and Maintaining Tension
- Common Mistakes to Avoid When Spooling Braided Line
- Post-Spooling Verification and On-Water Troubleshooting
- Frequently Asked Questions
Last Updated: October 18, 2026
Why Braided Line Twists and Slips During Spooling
A spool braided line twists and slips during spooling because of how the line is manufactured and how it interacts with your reel. Unlike monofilament, which has a uniform structure, braided line is woven from multiple strands. This construction makes it prone to spiraling as it comes off the supply spool.
The real culprit is spool direction mismatch. If your supply spool rotates in the opposite direction of your reel spool, the line naturally wants to twist. Add tension inconsistency, and the braid slides right off the arbor. Most anglers skip the backing step or use the wrong knot, which guarantees slipping on the first cast.
Here's what happens on the water: you cast, the line peels off your reel, and suddenly you've got a massive tangle or your lure drops short of the strike zone. Line twist causes the braid to kink, reducing casting distance and accuracy. Line slip means your drag settings are worthless because the line moves freely under the spool.
The good news is both problems are preventable with the right setup.
What You'll Need Before You Start
Gather these items before you load your reel:
- Braided line (the main line you'll be casting)
- Monofilament backing (20-30 lb test works for most spinning reels)
- Arbor knot knowledge (or look it up, it takes 30 seconds to learn)
- Electrical tape or electrical tape alternative (prevents braid from sliding)
- Pencil or rod holder (to hold the supply spool steady)
- Tension control method (your hand, a cloth, or a line spooler)
- Spinning reel (the tool you're loading)
- Spinning rod (to thread the line through guides)
- Scissors or line cutter
The most common mistake is skipping the backing. Backing serves two purposes: it fills reel capacity efficiently and prevents braid from slipping. Without it, you're fighting physics.
A pencil through the supply spool is your best friend. It lets you control tension and spool direction without fumbling. If you don't have a pencil, a wooden dowel or even a screwdriver works.
Understanding Braid Line Spool Direction and Reel Orientation
The supply spool your braided line comes on has a specific rotation direction. Most braided line spools are wound so the line comes off the top.
Here's the critical part: if you load the supply spool backward, the braid will twist as it winds onto your reel. The line wants to follow its manufactured spiral, and forcing it the wrong way creates tension and kinks.
To check spool direction, hold the supply spool in front of you. Turn the handle of your spinning reel. Watch which direction the bail moves.
Many anglers set up a simple pencil-and-spool system: push a pencil through the center of the supply spool, hold it steady with one hand or clamp it in a vise, and let the supply spool rotate freely as you reel.
The fill level of your reel matters too. Most spinning reels perform best when filled to about 1/8 inch from the spool lip. Underfilled reels reduce casting distance. Overfilled reels cause line to spill off during casting.
How to Spool Braid on a Spinning Reel with Monofilament Backing
Loading braid on a spinning reel requires a specific sequence. The backing goes on first, then the braid. This two-line approach prevents slip and fills the reel efficiently.
Start by filling your reel with monofilament backing. Most anglers use 20-30 lb monofilament. The backing layer should take up about 60-70% of your spool capacity, leaving room for the braid you'll add on top.
Why backing first? Monofilament grips the arbor better than braid. It creates a friction layer that holds everything in place. Without it, the braid will slip under load, especially during hard runs or when setting the hook.
Attaching the Arbor Knot and Securing Your Backing
The arbor knot is the connection point between your reel and backing line. It's simple and reliable.
Tie an overhand knot around the reel arbor with your monofilament backing. Make the loop large enough to slip over the arbor easily. Pull it tight around the arbor, then tie a second overhand knot about 6 inches up the line. Trim the short end close to the first knot.
Before you tie, wrap the arbor with one or two layers of electrical tape. This tape prevents the knot from slipping and protects the arbor from damage. The tape creates friction that holds the knot in place.
Once the arbor knot is secure, start reeling. Keep tension on the backing as it winds onto the spool. Use your fingers or a cloth to apply light pressure, just enough to keep the line snug but not so tight that you strain the reel handle.
Fill the reel with backing until you reach about 60-70% capacity. Stop when there's still visible space between the line and the spool lip.
Filling the Reel to the Correct Level
The fill level determines casting performance and braid capacity. Too little backing, and you waste reel capacity. Too much backing, and you don't have room for enough braid.
Check your reel's manual for the recommended fill level. Most spinning reels perform best when the line sits about 1/8 inch below the spool lip. This spacing prevents line from spilling during casts while maximizing the distance you can cast.
Measure the fill level as you reel. When you reach the target height, stop and prepare to attach the braid.
How to Prevent Line Twist on a Spinning Reel When Loading Braid
Now comes the spool braided line. Attach it to your backing using a reliable knot, the Uni knot or Palomar knot both work well for connecting braid to mono.
Trim both lines close to the knot to reduce bulk as it passes through your rod guides. The connection knot will be tight, so make sure it's solid before you start spooling.
Set up your supply spool with the pencil through the center. Hold the pencil steady with a helper or clamp it in a vise. The supply spool should rotate freely as you reel.
Here's the twist prevention step: make sure the supply spool rotates in the same direction as your reel spool. Watch the bail arm move as you turn the handle.
Start reeling slowly. Apply light, even tension to the braid with your hand or a cloth as it winds onto the reel.
Watch for twists as the line winds on. If you see the braid starting to spiral or kink, stop immediately. Loosen your tension and check the spool direction. Correct it before continuing.
Threading Braided Line Through Rod Guides and Maintaining Tension
Once your reel is fully loaded, the line goes through the rod guides. Start at the guide closest to the reel (the guide nearest the handle) and thread through each guide toward the rod tip.
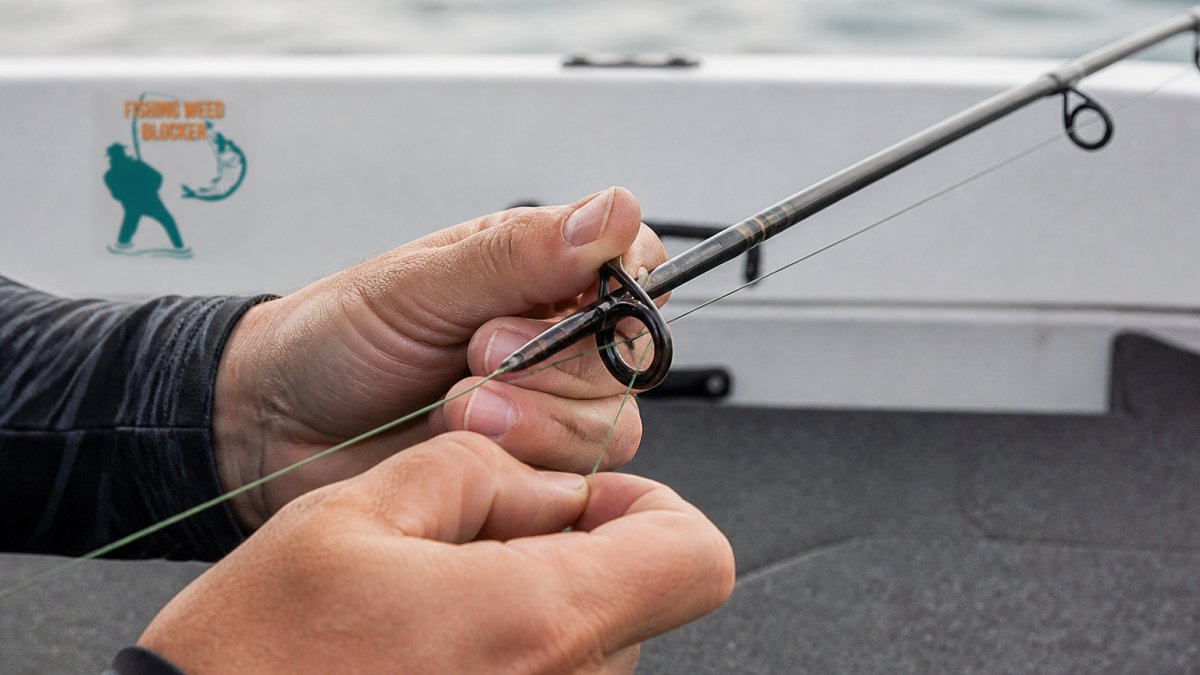
Braided line is thinner than monofilament of the same pound test, so it passes through guides easily. This is an advantage, less friction means smoother casts.
As you thread, maintain light tension on the line with your other hand. This keeps the line organized and prevents loops or slack.
Test the line path by running your hand along the rod from handle to tip. The line should sit in each guide smoothly without crossing or bunching.
Tie your leader or lure to the end of the braid using a reliable knot. The Palomar knot or improved clinch knot both work. Trim the tag end close to the knot.
Before you hit the water, check the entire line path one more time. Spin the reel handle slowly and watch the line feed off the spool and through the guides.
Common Mistakes to Avoid When Spooling Braided Line
Most spooling failures trace back to a few preventable errors.
Skipping the backing layer. This is the number-one mistake. Without backing, your braid will slip on the arbor under load. You'll lose fish and waste time retying.
Loading with the wrong spool direction. If the supply spool rotates opposite your reel spool, the braid will twist as it loads.
Applying inconsistent tension. If you reel fast with loose tension, then slow with tight tension, the line lays unevenly on the spool.
Overfilling the reel. Line that sits above the spool lip will spill off during casting. You'll lose distance and accuracy. Fill to the manufacturer's recommended level, not beyond.
Using the wrong knot. The arbor knot works. The Uni knot and Palomar knot connect braid to backing reliably.
Neglecting electrical tape on the arbor. Tape prevents the arbor knot from sliding. Without it, tension can slip the knot loose over time.
Threading the line through guides too quickly. If you rush, you'll miss a guide or create a loop. Slow down and check each guide as you go.
Post-Spooling Verification and On-Water Troubleshooting
Before you cast, verify your setup. Spin the reel handle slowly and watch the line feed off the spool.
Check the fill level one more time. The line should sit about 1/8 inch below the spool lip. If it's too high or low, adjust now.
Make a few practice casts on land. Watch the line as it leaves the reel. It should feed smoothly and straight.
Common on-water issues and fixes:
Line twist visible during casting. This usually means the supply spool was loaded backward. You can't fix it on the water, you'll need to respool. Next time, check spool direction before loading.
Line slipping under the reel handle pressure. The arbor knot is loose or the backing isn't gripping.
Reduced casting distance. The reel is underfilled, or the line lay is uneven. Check the fill level and consider reloading with more consistent tension.
Line tangles during casting. Uneven line lay or a missed guide. Check your entire line path from spool to rod tip. Look for crossing lines or loops.
When your reel is spooled correctly with braided line and your lure is protected from weed fouling, you cast more confidently and catch more fish.
Getting braided line on your reel without twists requires attention to spool direction, proper backing, and consistent tension.
American Fishing Wire's braided line guide
Shimano reel loading specifications
IGFA knot-tying standards for fishing line connections
Frequently Asked Questions
Should braided line come off the spool clockwise or counterclockwise?
Braided line should come off your supply spool in the same direction your reel's bail rotates. If your reel rotates counterclockwise, the supply spool should unwind counterclockwise. Matching the direction prevents line twist and reduces the chance of loose loops forming on your reel spool. Check your reel's rotation direction before you begin spooling.
Do you need monofilament backing when spooling braided line on a spinning reel?
Yes, monofilament backing is highly recommended. Braided line is slippery and can slip on the reel arbor under load. A layer of monofilament backing or electrical tape creates friction, securing the braid and preventing slipping. Most anglers use 20-30 yards of mono backing before tying on the braid with an arbor knot for reliable hold.
How tight should braided line be when spooling a reel?
Maintain steady, even tension throughout spooling, firm enough to keep the line from slipping, but not so tight that you compress the braid excessively. Most anglers use thumb and forefinger to pinch the line just above the reel, applying consistent pressure. The line should lay evenly on the spool with no gaps or overlaps. Too much tension causes line damage; too little allows slipping and twisting.
Why does braided line form loose loops or twists after spooling?
Loose loops usually result from mismatched spool direction, insufficient tension during loading, or incorrect reel-to-supply-spool rotation. If the supply spool unwinds in the opposite direction of your reel's rotation, the line naturally wants to twist. Also, if you release tension mid-spool, the braid can bunch up. Always match directions and maintain consistent hand pressure throughout the process.